
Windows Implementation
Domain Controllers
Two Domain Controller configurations were prepared: DC01 — the primary DC that initially creates the domain, and DC02 — a Server Core DC as a minimal installation without a GUI.
The goal was to standardize the installation and initial configuration through Answer files (autounattend.xml), producing a functional Active Directory domain that serves as the foundation for all other VMs (file server, Windows 11 client).
DC01 — Primary Domain Controller
An Answer file was created to standardize the initial OS installation — language/WinPE settings, computer name, and creation of a local administrator account for initial use. This produces a functional DC that allows the domain to later accept members (FS01, DC02, Windows 11 client) and have administrative and security policies applied.
DC02 — Server Core Domain Controller
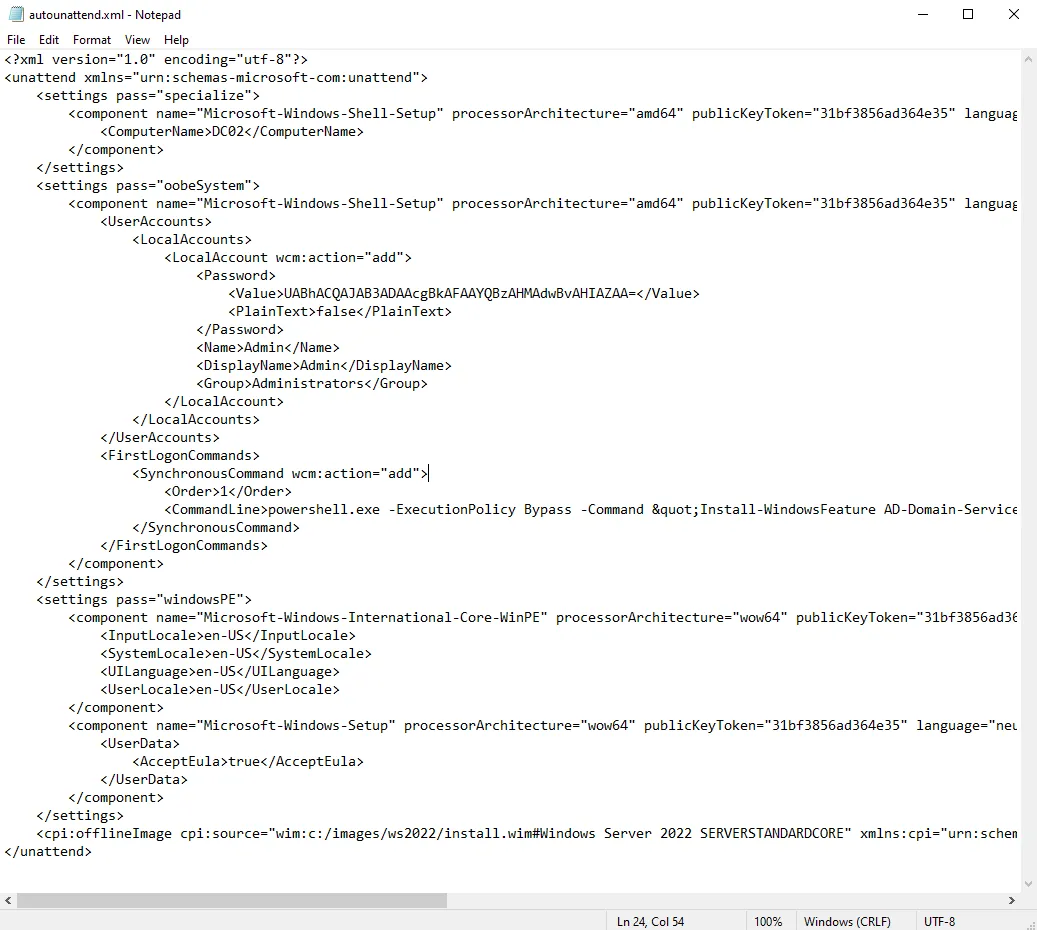
A separate autounattend.xml was created for Windows Server 2022 Standard Core. The Answer file defines:
- windowsPE parameters — basic regional settings and EULA acceptance for Windows Setup
- specialize — sets the computer name to DC02
- oobeSystem — creates a local
Adminuser with administrator privileges, and throughFirstLogonCommandsautomates the installation of Active Directory Domain Services and DNS roles as preparation for promotion to an additional DC in the domain
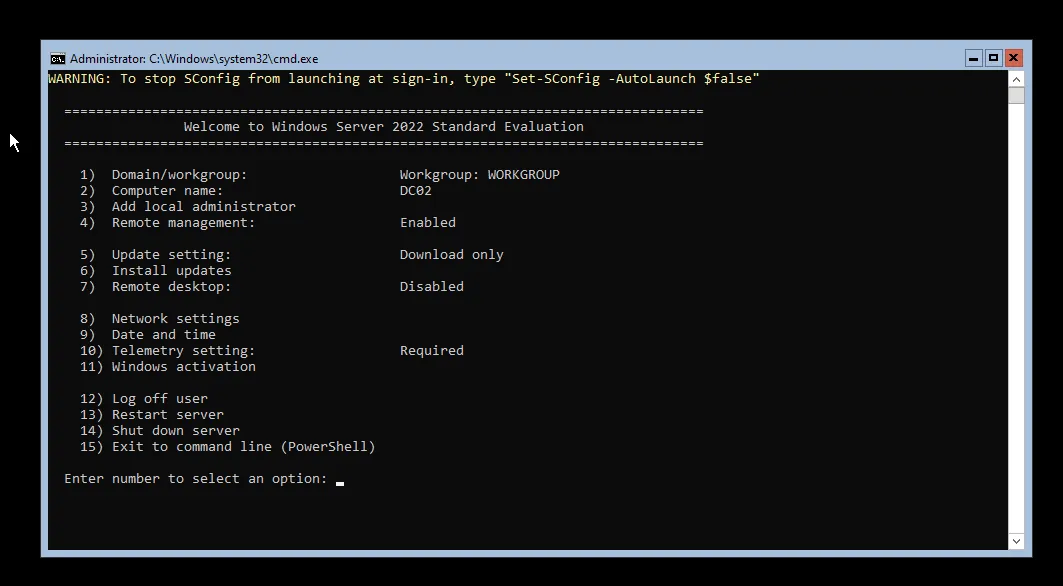
Server Core is then configured entirely through SConfig and PowerShell (no GUI).
FS01 — File Server with DFS and FSRM
The goal for FS01 was to automate the Windows Server installation and prepare the machine as a file server with DFS (Distributed File System) and FSRM (File Server Resource Manager) capabilities.
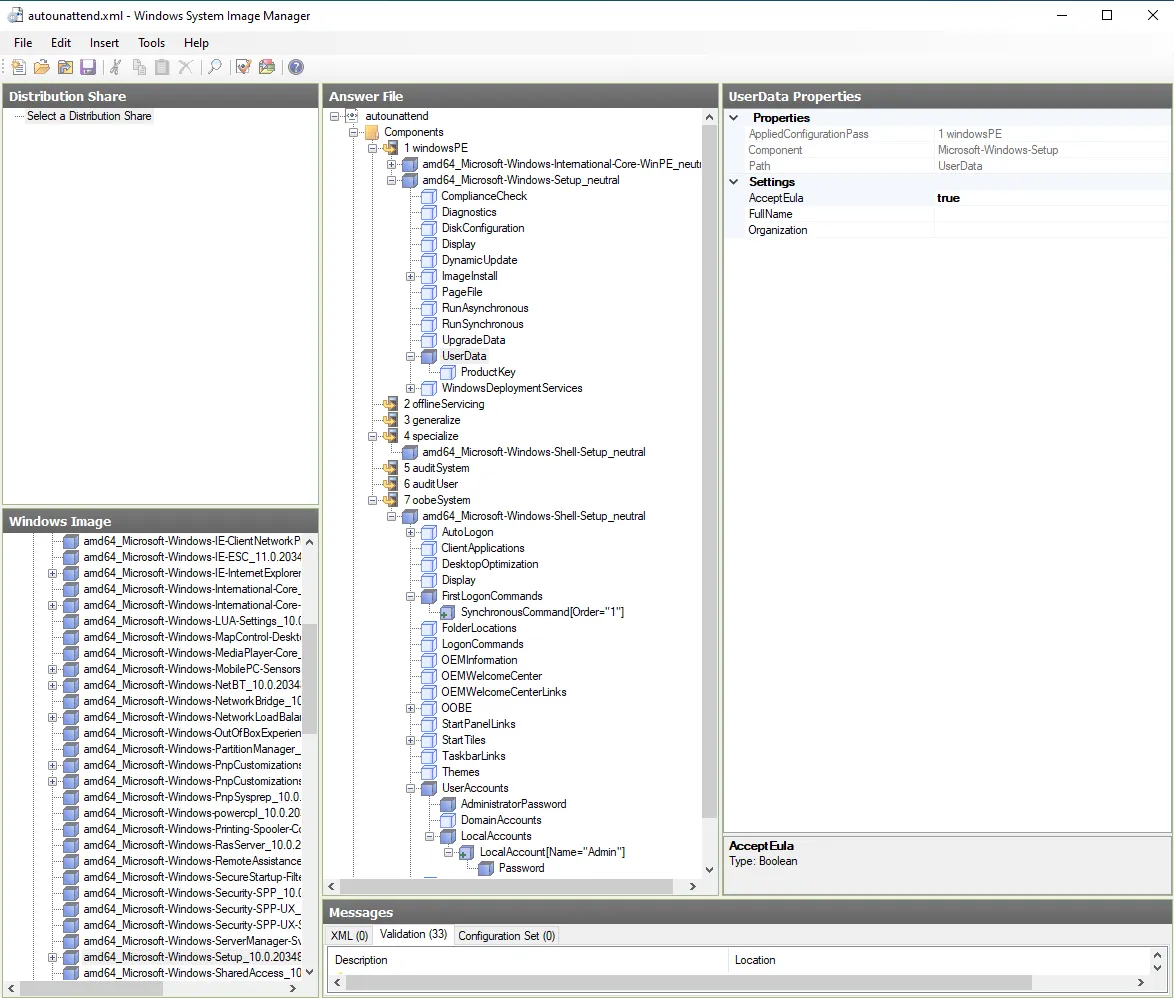
The Answer file was built in Windows System Image Manager (WSIM), and the installation was performed in VMware Workstation using an additional ISO containing the autounattend.xml in the root directory.
The WSIM configuration covers:
- windowsPE — accepts EULA and sets basic WinPE settings
- specialize — sets computer name to FS01
- oobeSystem — creates a local
Adminuser in the Administrators group
To install file server features automatically, the FirstLogonCommands mechanism runs a PowerShell command at first logon that installs the required Windows features:
Install-WindowsFeature FS-DFS-Namespace, FS-DFS-Replication, FS-Resource-Manager -IncludeManagementToolsThis gives FS01 the required DFS and FSRM capabilities without any manual intervention.
Answer File Distribution
A small ISO was created using oscdimg (part of the Windows ADK tools) to package the Answer file, then mounted as a second CD/DVD drive in the target VM.
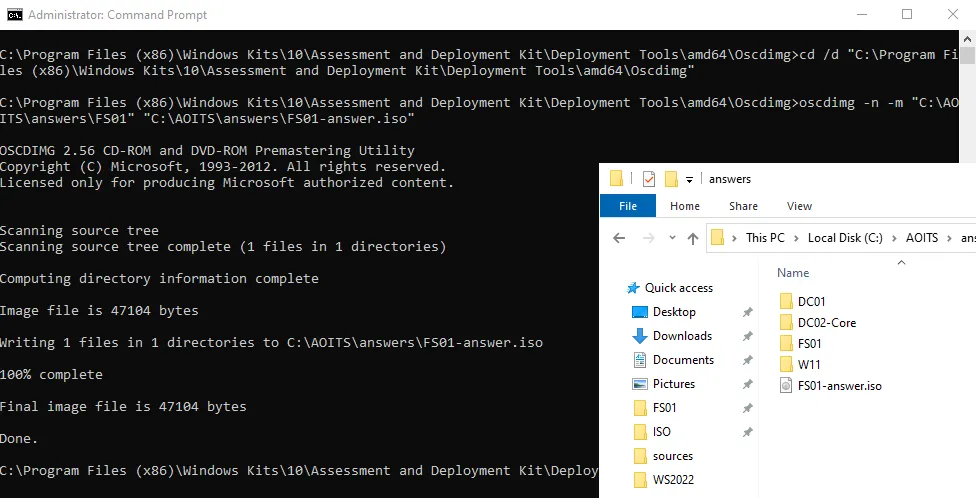
After installation, FS01 boots without requiring manual input for most settings and is ready for domain joining and shared resource configuration.
Windows 11 — RSAT and Hyper-V
The Windows 11 client serves as a management workstation for domain administration and as a local virtualization platform via Hyper-V.
The Answer file creates a local Admin user in the Administrators group, then uses FirstLogonCommands to automate post-install configuration:
Enabling Hyper-V:
dism.exe /Online /Enable-Feature /All /FeatureName:Microsoft-Hyper-VInstalling RSAT tools for AD administration:
Get-WindowsCapability -Name RSAT* -Online | Add-WindowsCapability -OnlineA system restart is added after enabling Hyper-V to ensure all components load correctly.

Linux Implementation
Kickstart — Automated VM Provisioning
A Kickstart configuration (ks.cfg) was created to automate the initial setup of a CentOS Stream 9 VM. It handles disk partitioning and prepares the system for centralized management via Ansible.
The Kickstart file configures:
- Disk setup —
zerombr,clearpart --all,autopart --type=lvm - Ansible user creation with SSH public key in
authorized_keys - Passwordless sudo via
/etc/sudoers.d/ansible - SSH access restricted to the management subnet (
10.10.68.0/22)
#version=RHEL9textlang en_US.UTF-8keyboard --xlayouts='us'timezone Europe/Zagreb --utcselinux --enforcingfirewall --enabled --service=sshservices --enabled=sshd,chronydreboot
network --bootproto=dhcp --device=link --activate --hostname=cs9-ansiblerootpw --plaintext change_me_root
zerombrclearpart --all --initlabelautopart --type=lvm
%packages@^minimal-environmentsudoopenssh-serverpolicycoreutils-python-utils%end
%post --log=/root/ks-post.log --interpreter=/bin/bashset -e
useradd -m -s /bin/bash ansible
cat >/etc/sudoers.d/ansible <<'EOF'ansible ALL=(ALL) NOPASSWD: ALLEOFchmod 0440 /etc/sudoers.d/ansible
install -d -m 0700 -o ansible -g ansible /home/ansible/.sshcat >/home/ansible/.ssh/authorized_keys <<'EOF'ssh-ed25519 <PUBLIC_KEY_HERE>EOFchown ansible:ansible /home/ansible/.ssh/authorized_keyschmod 0600 /home/ansible/.ssh/authorized_keys
if ! grep -q '^AllowUsers' /etc/ssh/sshd_config; then  echo 'AllowUsers ansible' >> /etc/ssh/sshd_configfi
cat >/etc/ssh/sshd_config.d/10-management-only.conf <<'EOF'Match Address 10.10.68.0/22  AllowUsers ansibleMatch All  DenyUsers ansibleEOF
systemctl enable sshdsystemctl restart sshd || true%end
The Kickstart installation is launched by adding the boot parameter inst.ks= pointing to the file location (e.g. served over HTTP from the management machine).

Imperative Configuration — Bash System Report
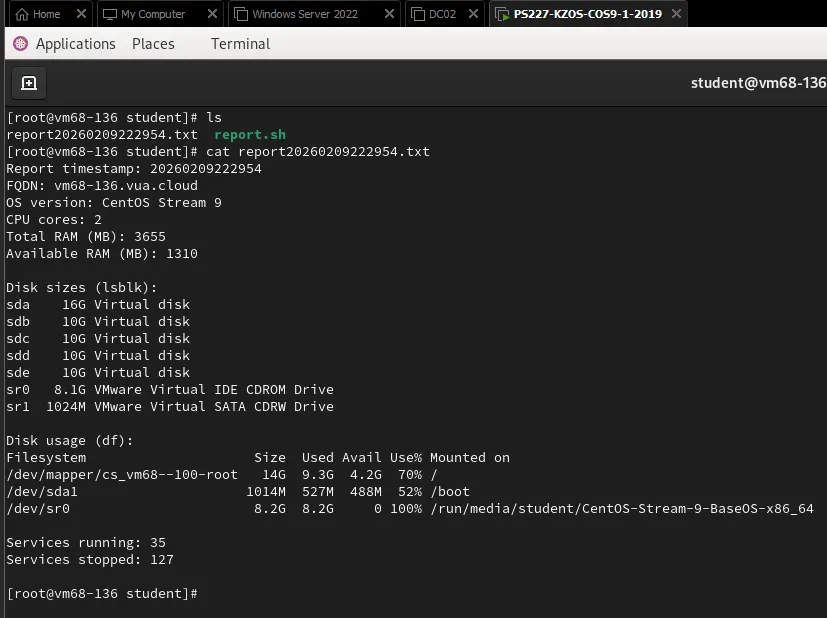
A bash script (report.sh) was implemented that automatically generates a system status report and saves it to a file named report_YYYYMMDD_HHMMSS.txt.
The report includes:
- FQDN of the machine
- OS version
- Number of CPU cores
- Total and available RAM
- Disk sizes and usage
- Number of running and stopped services
- A warning at the end if any filesystem exceeds 70% usage
Declarative Configuration — Ansible Playbook
An Ansible playbook was implemented to install and configure nginx on the target server. The playbook handles:
Two virtual hosts:
- Default page — serves a page with the content “Ovo je defaultna stranica studenta Marin Kresic”
- algebra.hr — serves “Ovo je Algebrina stranica koju je kreirao student Marin Kresic”
Firewall rules — firewalld is enabled and configured to allow HTTP, HTTPS, and SSH using the Ansible firewalld module.
Self-signed TLS certificate for algebra.hr — the playbook includes renewal logic that regenerates the certificate if it expires within 5 days.

To verify the algebra.hr HTTPS virtual host, a curl test was run with -k (to accept the self-signed certificate) and --resolve (to map the domain to the server IP without DNS):

Conclusion
This project demonstrates a practical approach to IT automation and orchestration through a combination of automated installations and declarative configuration management:
- Windows Answer files standardized the deployment of 4 machine types — two Domain Controllers (GUI and Server Core), a File Server with DFS/FSRM, and a Windows 11 management client with Hyper-V and RSAT
- Kickstart automated Linux VM provisioning with Ansible-ready configuration (SSH keys, passwordless sudo, subnet-restricted access)
- Bash scripting provided imperative system reporting with disk usage alerting
- Ansible delivered declarative nginx deployment with virtual hosts, firewall rules, and self-signed TLS with automatic renewal
The result is a repeatable, verifiable configuration that reduces manual work, speeds up environment provisioning, and simplifies maintenance through clear configuration files and automated procedures.